there are lots of difinations of rat, they are used to connect and manage a single or multiple computers with a variety of tools, such as:
* Screen/camera capture or control
* File management (download/upload/execute/etc.)
* Shell control (usually piped from command prompt)
* Computer control (power off/on/log off)
* Registry management (query/add/delete/modify)
* Other product-specific function
In this topic I will show to the people who don't know how to setup DarkComet RAT v3.0.

I will show how setting up the client and how creating a server with the best settings for run under the most different configurations
Download DarkComet RAT v3.0 from its official website
Ok after you download the package lets go
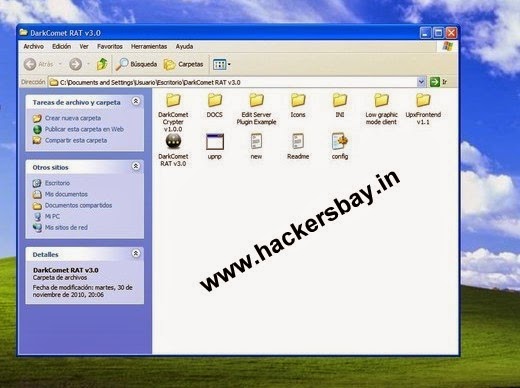
After downloading the package extract it and open the folder you will see this content on the folder

Execute DarkComet. You will see the main page of the programme
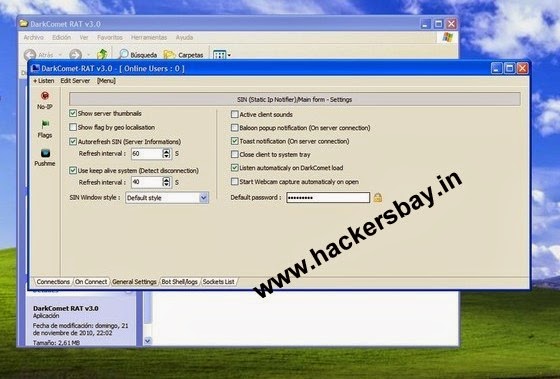
This version is allready configured so we can use it without troubles. the important thing is that remember your password because if its wrong and its not the same you provided, the server connection attempts wil be refused.
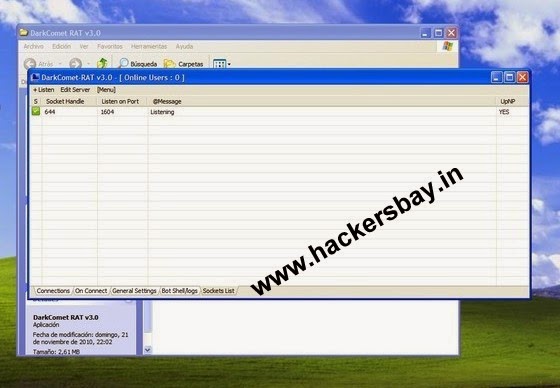
In socket list you will see the ports are monitored by the client to establish the desired connections with the servers. As you can see here i've configured it as by default at port 1604 and with upnp activated. If your router supports upnp port forwarding will do automatically.
What i mean with port forwarding ?
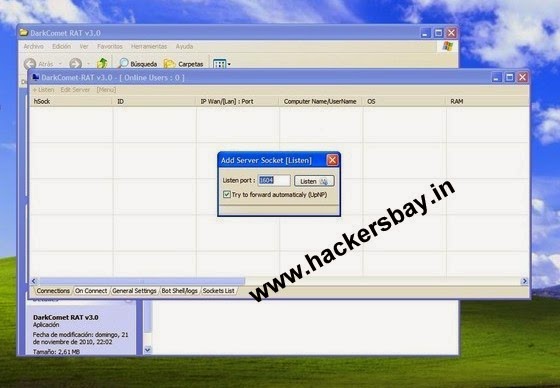
To add more listening ports you can do it by clicking on listen on the menu or right click on the listview of the sockets in the socket list tab.

click on server module and there is a option of server builder

Double click on the left column settings-01 and you will see this message box
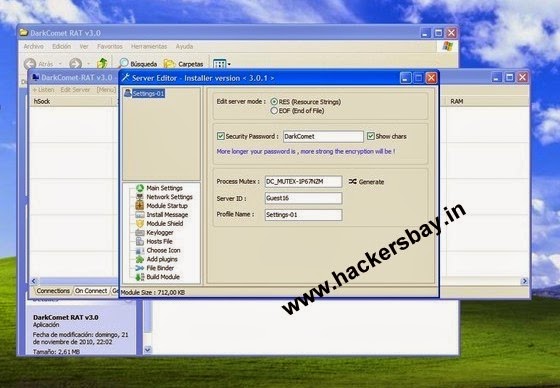
The edit server mode is important to remember if you wish to cript this server in future, RES mode is compatible with the vast majority of the crypters EOF mode is only compatible with the crypters that support EOF Data like crypters that works with Bifrost.
In password field you need to provide the same password configured in the client the password i've used is DarkComet
And The mutex is used to avoid to run more than one instance of the server on the same computer to avoid issues

Here you can configure the ip where the server will connect type your no-ip you have and the port you forwarded correctly and is open and used by the client

Here you can configure the installation options of the server. The image shows the recommended settings. Using the app path will ensure your server installs correctly in evrey systems also in systems with limited users privileges. Otherwise the server will fail to install itself.

The other options ARE NOT important they are optional you can decide to bind the file with another or shield even more the server to ensure that you dont lost connections but activating the persistance option of the shield makes the server unkillable even for yourself that you dont be able to uninstall or close the server. Other options like kill some process of windows and other i dont recommend it.
You can decide activate the offline keylogger. If you forgot like me to activate me doesnt matter you can activate it later
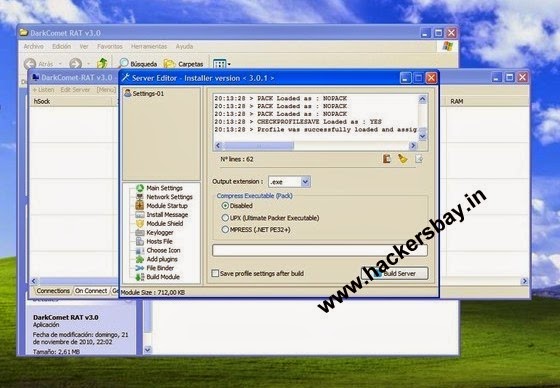
Final step to get your server you only need to click to the build button and thats all.
You will be askin why we dont compress the server in this step the reason is because after compressing it. it seems it doesn't work very good and dont compress the server, as we will compress it later and that will reduce size of the server.
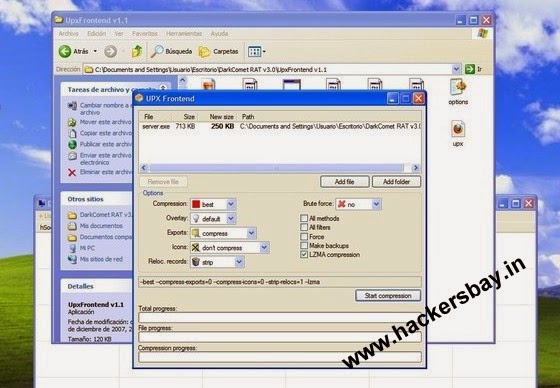
Go to the UPX frontend folder and execute the upxfrontend exe. You will see that window. And configured it correctly be sure is configured as in this image of this app will broke your server and will not work. Be sure is configured as in the image. Press start compression and you will see the server is reduced to only 250kbs. Its very small taking in mind the huge functions darkcomet has. Compare it with cybergate that have a lot less functions and the size of the server is the same.
This process cant be maked after crypting the server first the server needs to be packed and then crypted or the server will be broken.
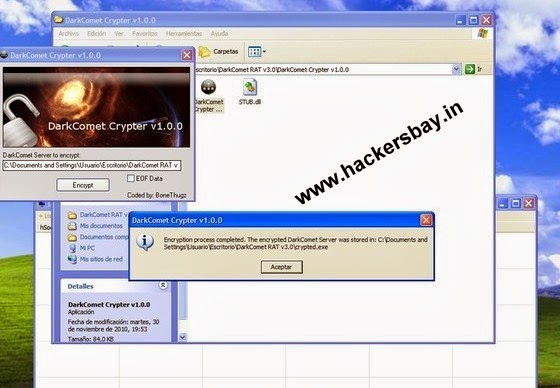
NOw Go to the DarkComet Crypter folder and run the client. Click when it indicated and press encrypt if you selected eof data check the eof data box if not its not needed. After pressing encrypt and if it all worked correctly you will recive this messagebox.

Thats all now you have your OWN server compressed and crypted only 250kb and detected only by avira and a-squared.
And works like a charm
i've tried my best to make it noob freindly..
source:- google
Dude..!! Cheer up Man..!! Awesome
ReplyDelete